Light is both a blessing and a curse for photographers! Without it, Hershel could not have coined the term "photography", which literally means "writing with light" (Photo means light, graphy means writing). On the other hand, if uncontrolled, light is an obstacle for anyone wishing to work in the darkroom.
Fogged paper is the muddy, low-contrast product of harmful light in the darkroom. Light can sneak into the darkroom in many ways, but few people realize that even the trusty darkroom safelight can cause fogged paper.
Photo paper spends several minutes under the safelight before it is fixed, and in that time a safelight that is overly bright, or the wrong color, can ruin a great print.
This article gives step-by-step instructions for a comprehensive safelight test. After completing the test, you will know how long your paper can stay under the safelight without fogging.
Before you begin
Check Your Darkness
The first step is to make sure your darkroom is free of light. Before you use it, test your darkroom for lighting problems.
The Leak-Free Room
Turn off all the lights, including the safelight, and sit in your darkroom for a time. It may take up to 10 minutes, but eventually your eyes will adjust and problem light leaks will shine brightly. Now hold out one arm in front of you, with your palm out, like a traffic cop signaling "stop." Can you see the outline of your hand? Plug any holes and use darkroom Blackout Cloth to curtain entrances.
Stray Enlarger Light
Turn on your enlarger lamp and look around the room. If the light reflects brightly off any shiny objects, mask them off. (Mask-off shiny things you bring into the room, too, like "canned air".)
Now, inspect your safelight. Check to make sure that has the correct wattage bulb, and that your filters are not cracked. While you are at it, look at the electrical cable to make sure that it is also in good shape with no splits or exposed wire. Switch on your safelight and inspect housing. Make sure that no white light is leaking through. Check your filters for leaks also.
Overview
This test is comprised of two parts. In the first part of the test, you will determine the flash-point for your paper. The flash-point is the exposure time just before a visible gray tone is produced. When paper is “flashed,” it becomes more sensitive to any light that it is later exposed to. The flash-point will be used in the next part of the test, to determine how long a sheet of exposed paper can be subjected to the safelight before fogging.
In the second part of the test, you will mask off a fresh sheet of photo paper and “flash” expose it for the time determined in the first part of the test. This flash exposure will cause the paper to react to the safelight in the same way an exposed print does. After flashing the paper, you will expose it to the safelight in increments of several minutes (just like making a test strip under the enlarger). After processing, you will be able to see any effect that the safelight has had on your paper, and take corrective actions if necessary.
A word about safelight filters...
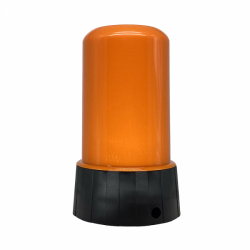
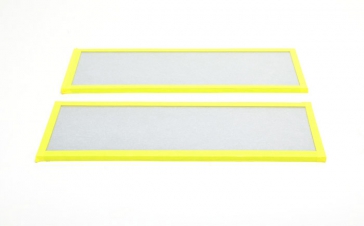
If you have been experiencing problems with fogged paper, check the manufacturer’s instruction sheet to determine the appropriate type of safelight. Most graded and multi-contrast papers need an amber (OC) safelight.
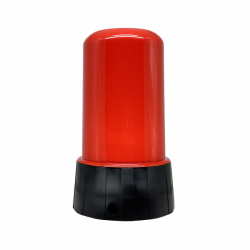
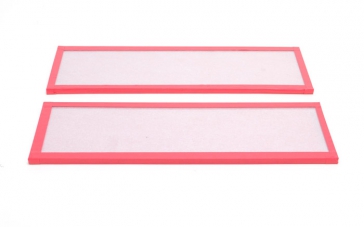
Red (1A) safelight filters are typically used for orthochromatic materials like litho film, certain liquid emulsions and some B&W photo papers. Never mix OC and red safelights in the darkroom -- even if a paper can be used with either safelight, the combination will usually cause fogging.
Comprehensive Safelight Test:
You will be working in total darkness for most of the test, so it might be helpful to buy some phosphorescent (glow-in-the-dark) tape and mark each of your trays and your tongs. These, plus the glow of your darkroom timer, should be all that you see when the lights are off.
You will need:
Part One:
What is the flash-point of the paper?
Part Two:
How long can my exposed paper be subjected to my safelight before it fogs?
Part Three:
Evaluate
If your paper was unaffected by the safelight, you should have a solid white sheet of paper with no grey areas at all. If this is the case, congratulations!
Your paper can be safely exposed to your safelight for at least seven minutes. (If the paper is evenly light-grey with a 1-inch white border, then your flash-exposure was too long. As long as you do not see the steps from the safelight test strip, your safelight is still fine.)
If you see any of the steps from the safelight exposure test strip, then the safelight affected your paper. If you can make out one step it means that your paper is safe for 3 minutes under your safelight. Two steps means safe for 1 minute. If you see all four steps, your safelight is safe for less than one minute, and you should take immediate corrective action.
Corrective Actions:
Short Safelight Test:
You will need a piece of 8x10 photo paper, two pieces of 8x10 cardboard, as well as a 1"x10" piece of cardboard.
With your safelight on, set your piece of photo paper on top of one of the pieces of cardboard in the brightest area of the darkroom. Typically this is where the developer tray is located. Place the strip of mat board lengthwise in the middle of the sheet. Let the entire sheet expose to the safelights for 1 minute. Cover 3/4 of the paper with the second piece of cardboard, and expose for 1 minute. Cover 1/2 the paper and expose for 2 minutes. Cover 1/4 of the paper and expose for 4 minutes. You now have exposures of 1,2, 4, and 8 minutes.
Process and dry the paper. If you cannot distinguish between the area covered by the strip of mat board and the white paper on either side, then you are reasonably safe for that length of exposure to the safelight. Should you see a difference at the 8 minute exposure, then you know that you are safe for at least 4 minutes. Keep in mind that it may take 3 or 4 minutes before an exposed sheet of paper gets to the fixer tray.
Repeat this test for each type of paper you will use.
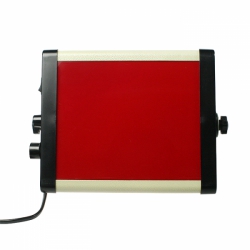
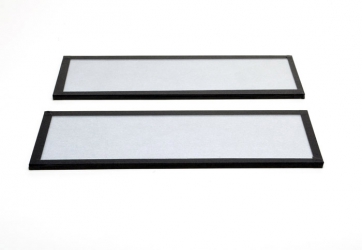
Safelights
Safelights
Safelights
Darkroom Accessories
Darkroom Accessories