It may seem like magic, but the steps to making a great black and white print are simple and methodical. This article will provide a step-by-step guide to paper processing, for both Fiber and RC prints, as well as some helpful hints to guide you on your way. Also, if you are starting your darkroom from scratch, you will want to see our Darkroom Supply List.
All processing times listed are for chemicals kept at about 68 ° F. This is especially important for developer and fixer. If you are using graded enlarging paper, print contrast can be somewhat manipulated by varying your developer dilution. For the majority of developers, increasing the dilution results in lower contrast, while decreasing the dilution results in higher contrast. Do not change your developing time when changing dilutions. You should always experiment with test strips for the best results.
Note: Be advised that over-diluting beyond the manufacturer's recommendations tends to produce weaker blacks in the print.
First, start your timer. Then, slide your print face up into the developer in one smooth motion, ensuring that the entire surface of the print is submersed. The print needs a constant supply of fresh developer, so agitate by gently rocking the developing tray. Some printers like to grab the print with tongs, flipping it over and over. This practice carries the risk of damaging the paper.
The important thing is to keep things moving, and to keep the print covered with developer. If the print is properly exposed, an image will appear on the face of the print after about 15 seconds. At first it will be very light, but it will grow steadily darker. Do not get excited and pull the print out when it "looks ready." Develop the print for one and 1/2 minutes, no matter what it looks like in the tray. Remember (and this is extremely important): you control the darkness or lightness of the print with the exposure time, not the development time. If your print is too dark, toss it and expose the next sheet of paper for a shorter time.
Ten seconds before the ninety seconds of development are up, lift the print from the developer with the developer tongs. Let it drain for 10 seconds, and then place it gently in the stop bath. Agitate the print for 20 seconds.
Lift the print out with the stop bath tongs, let it drain for ten seconds, and then place it into the tray of fixer. Agitate the tray gently, in the same way you agitated while in the developer.
Fixer removes the light sensitive silver from the print, making it safe to take out into the light. It usually takes about 5 minutes in standard fixer to fully remove the residual silver. Always check your specific brand of fixer for instructions. If you are making a final print, fix for the recommended number of minutes to ensure long-term durability. If you are working with a test strip, you need only fix the print for about 30 seconds. It will not be safe for long-term storage, but it will be safe for you to briefly examine the strip in daylight.
Wash the print for at least 10 minutes under constantly running water. An archival print washer or a tray siphon washer are ideal, as they draw water from the bottom of the washer, where the chemicals accumulate. A regular processing tray can work too, if placed under running water. When using this method it is best to empty it several times during the wash, and shuffle the prints in the tray, to make sure the chemicals are completely removed. To prevent damage to the emulsion, RC paper should not stay wet for more than 20 minutes.
Squeegee your prints to remove water from the surface. You can then hang them by clips or leave to dry on a drying rack. You can also use a print drier (make sure that it is safe for RC paper) or gently dry with a hair drier.
When processing fiber-based paper, the basic procedure is the same. However, the time spent at each step will be different than for RC prints. In addition, you will need a Hypo Wash to help clear the fixer from your print, and it will take much longer to wash the print:
Develop your prints for 2-3 minutes. The image will become visible much more gradually than with an RC print. Again, use a consistent development time rather than developing by inspection.
Put your print in stop bath for about 30 seconds, as you do with RC paper. Fixing: Fix your print for at least 4-5 minutes. Check the instructions for your specific fixer for the exact fix time. As with RC paper, you can fix for a shorter time if working with a test strip.
Lift the print out with the stop bath tongs, let it drain for ten seconds, and then place it into the tray of fixer. Agitate the tray gently, in the same way you agitated while in the developer.
Fixer removes the light sensitive silver from the print, making it safe to take out into the light. It usually takes about 5 minutes in standard fixer to fully remove the residual silver. Always check your specific brand of fixer for instructions. If you are making a final print, fix for the recommended number of minutes to ensure long-term durability. If you are working with a test strip, you need only fix the print for about 30 seconds. It will not be safe for long-term storage, but it will be safe for you to briefly examine the strip in daylight.
Rinse fiber prints under running water for about 2 minutes before processing in hypo clear.
Hypo clear/ Hypo wash is the final tray of chemicals in your tray lineup. This step helps to clear fixer from the print, and reduces wash time which saves water. The duration is usually 1-2 minutes, with agitation, but check the label on your particular brand for instructions.
Washing a fiber print to archival standards is a time consuming task. The best way to do it is with an archival print washer. These washers can wash several prints at the same time, they use less water than other methods, and they are more effective. If you have an archival print washer, wash your fiber print for at least 30 minutes.
If you don't have access to an archival print washer, the next best thing is a tray siphon. These are not as efficient as an archival washer, but they are better than a tray without a siphon. The siphon drains the water from the bottom of the tray, where the chemicals settle, which means the wash water is much cleaner than in a standard tray. If you have multiple prints in a tray with a siphon, you will need to shuffle them frequently during washing, to make sure that each print gets equal time at the top of the pile.
Fiber prints should not be left wet for more than four hours, to prevent damage to the emulsion.
If you want to make sure that your print will last for years to come, you should use a residual hypo testing kit, such as the one made by Photographer's Formulary. This test will tell you conclusively whether all chemicals have been successfully removed during washing, which is essential to the archival longevity of your image.
Drying a fiber print is a little bit different than drying an RC print. Fiber paper takes longer to dry, and tends to curl during the drying process. Heated print dryers do a great job of avoiding this, but if you do not have one, a blotter book or a print drying screen will work well. Here are some tips for the use of blotter books:
Black and White Chemicals
Black and White Chemicals
Black and White Chemicals
Black and White Paper
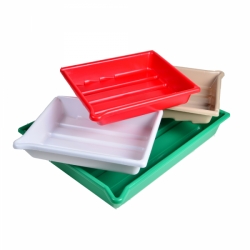
Darkroom Accessories
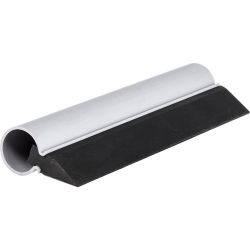
Darkroom Accessories