
By: Ted Orland
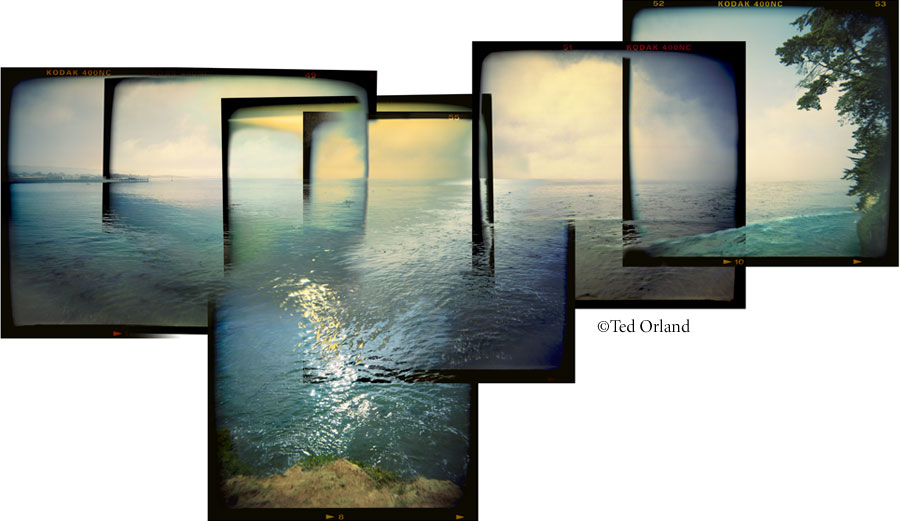
At least in theory, making a photographic panorama is entirely straightforward: take a picture, pan the camera and make a second picture partially overlapping the first, and so on as far around in any direction you please.
With digital images you can assemble the separate frames with a few keystrokes using the "stitching" command in programs like Photoshop or iPhoto. The downside, however, is that precisely because these programs are almost completely automated, they also reduce the artist's role in the process - and hence the range of possible artistic outcomes.
My own approach with the Holga has been to first create a new, blank Photoshop file having a large "canvas." Then I scan the separate negatives into that file - placing each new frame from my panorama-to-be onto its own individual layer - and manually move the individual pictures around until their key elements overlap.
I'm aided greatly in this effort by a feature common to all Holga images - namely, that they fade to black at the edges of the frame. The benefit of that vignetting is that as one Holga image becomes progressively darker toward the edges, the overlapping image from the adjacent frame is growing progressively lighter - and when you overlap them in Photoshop, the two images transition gracefully and naturally from one to the other. The technical secret for accomplishing this is to make the Layer Mode "Lighten Only."
From there it's largely a matter of finessing the details - mostly via liberal use of masking, and/or adjusting the "Blending Options" slider bars - until the overlapping elements are visually satisfying.